 |
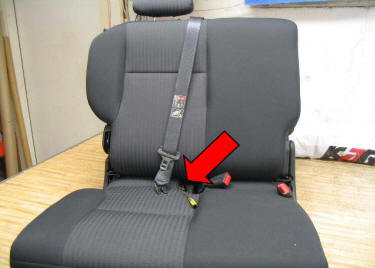
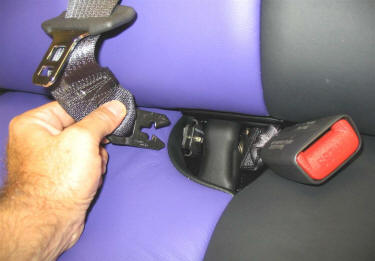
Release the center
SEAT BELT ANCHOR from the cushion by pushing the small button in the retainer clip. Click here to see close up pictures of the center SEAT BELT ANCHOR. |
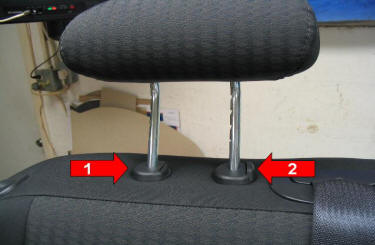 |
Remove the rear
headrest. The #2 'push button' is
obvious, |
 |
1. Pop the
headrest holders out. 2. Remove the
screws from the 3. Pop off the latch release button trim. |
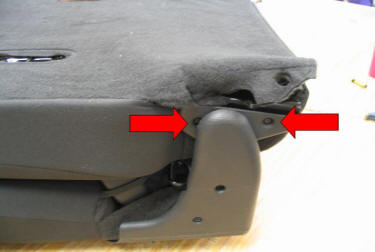 |
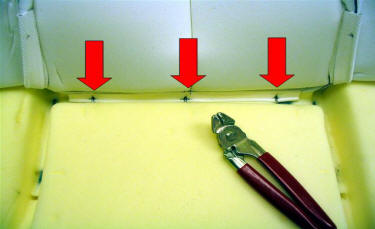
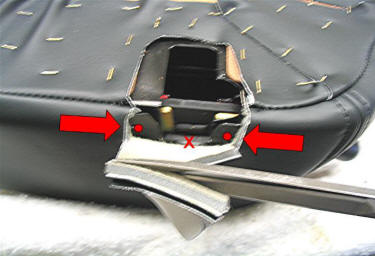
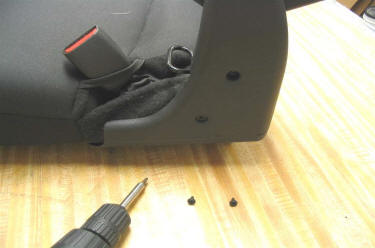
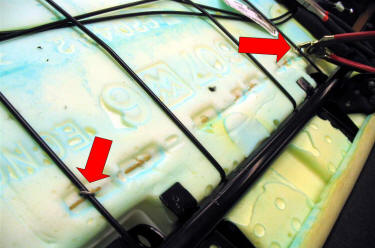
Remove the 2
inboard side screws (shown here by the Red arrows) Pull out the carpet from behind the plastic cap. Do not remove the plastic cap. Reinstall the screws now! The new carpet does not go under the plastic cap. |
|
|
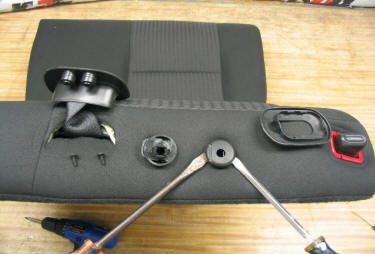
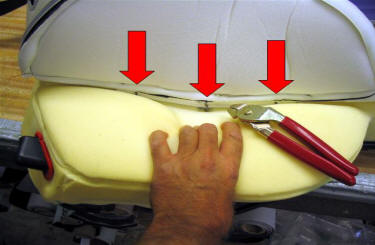
Remove the screws
from the plastic trim pieces. Peel up the carpet and remove the 4 bolts attaching the backrest to the hinges. |
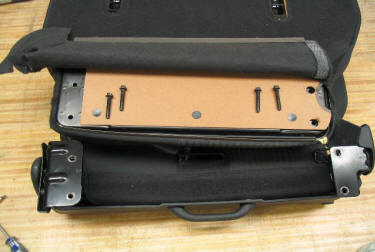 |
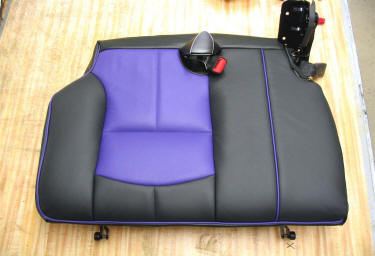
After the 4 bolts
are removed separate the backrest from the cushion. |
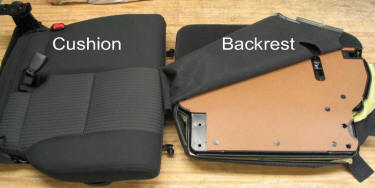 |
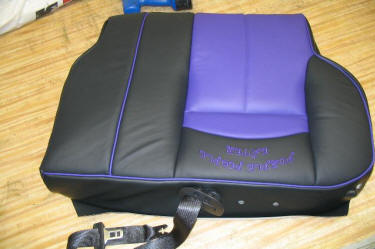
Separated. |
 |
|
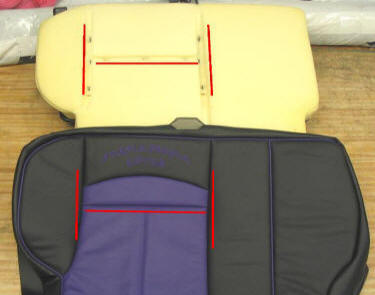 |
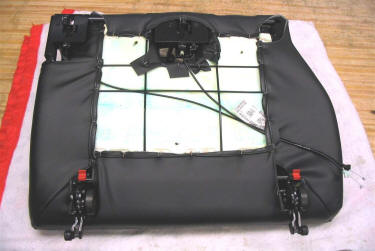
The Listing Strips
of the upholstery form an "H". |
 |
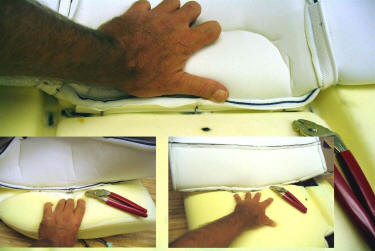
Install the new
upholstery. Use the provided hog rings and pliers. Center the new upholstery in the depression of the foam. Install the cross bar of the |
 |
Install the sides of the "H" next. |
 |
Once the Listing
Strips are hog-ringed, roll the edges of the new upholstery over the foam. |
 |
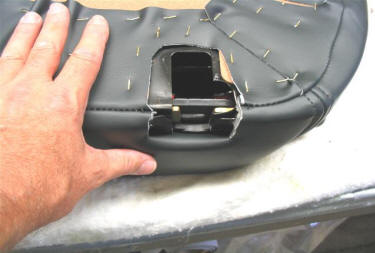
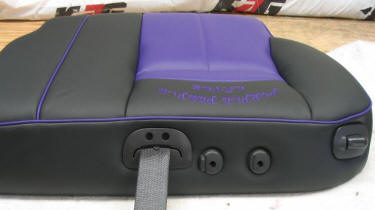
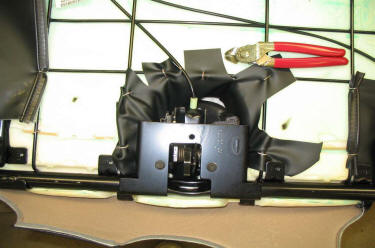
Feed the center
seat belt and trim through the upholstery. |
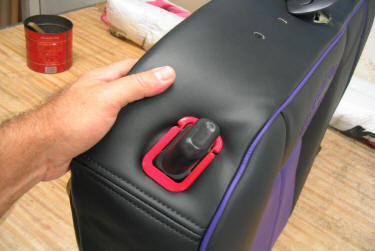 |
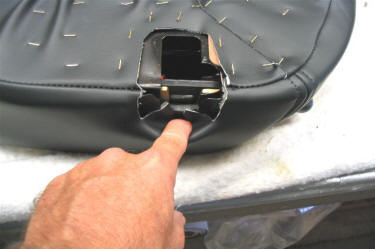
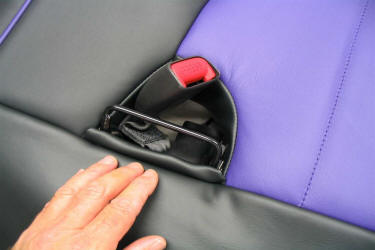
Wiggle and stretch
the pre-cut opening around the latch release button. |
 |
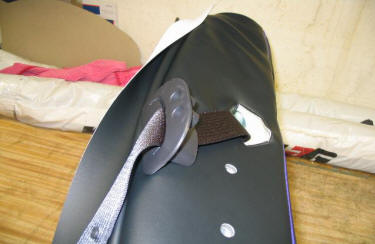
Turn the backrest
over. Cut the original panel board away from the outboard bolt holes, as the factory did for the inboard side. The line to cut is shown here marked with a black line. |
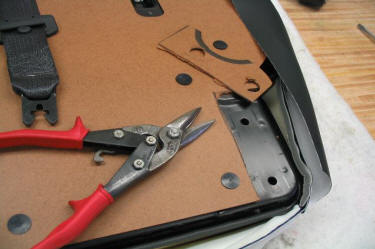 |
This will allow the hinge to clear the hardboard, as the inboard side does. Use a tin snip pliers. |
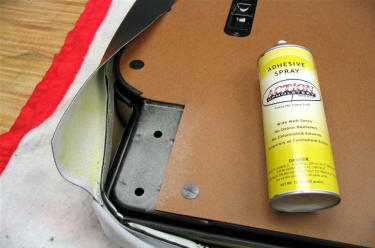 |
Spray glue over
the steel of these hinge areas, and the back of the new upholstery. (glue supplied) This will hold the upholstery in the area under the hinges. |
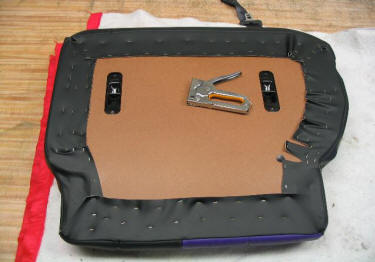 |
Pull the edge of the upholstery past the steel for a straight tight fit and staple in place. |
 |
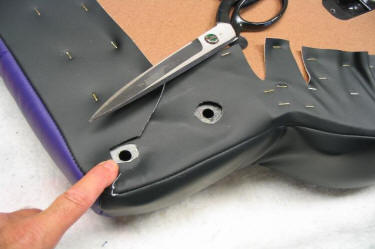
Cut the upholstery to clear the side latch release. |
 |
Cut the upholstery
down to clear the screw holes for the trim plate. (Shown here by the Red Dots) |
 |
Fold the upholstery in.... |
 |
and under the foam of the seat. |
 |
Cut the upholstery away from the bolt holes. |
 |
Install the
center seat belt, headrest, and latch button trim. Set the backrest aside and upholster The rear seat cushion: |
| The rear seat cushion: | |
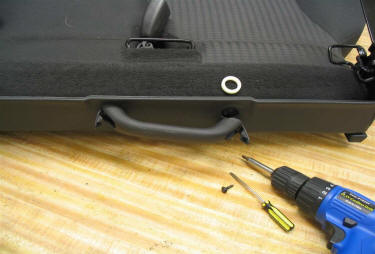 |
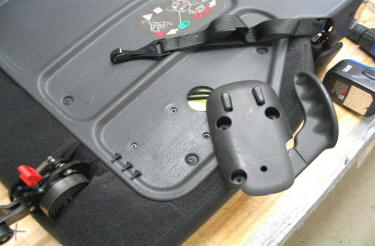
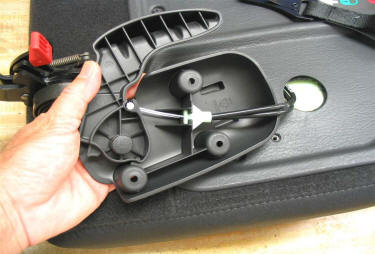
Remove the
carry handle: Pry open the ends with
a small screwdriver |
 |
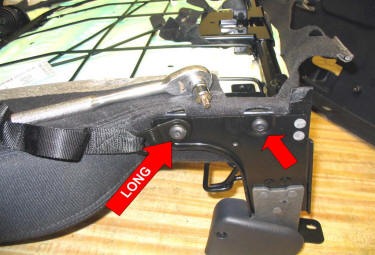
Remove the 2
screws from the outboard hinge. The one on top is LONG, the one below is SHORT. A piece of tape placed on the top hole and on the long screw will help when re-assembling. Keep the long and short screws together in plastic bag #2. |
 |
Remove the 2
screws from the inboard side. These are normal MEDIUM length screws. Place all the medium screws in plastic bag #3. |
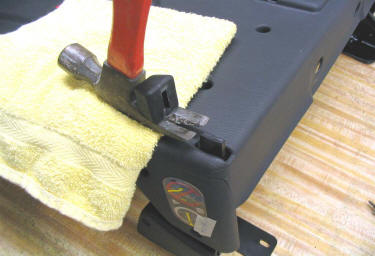 |
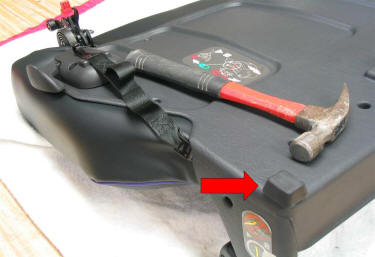
Pry off the
rubber bumper with a claw type hammer. (I've noticed that not all PTs have this bumper) Use a towel to protect the plastic from scratches. |
 |
Remove the 3
MEDIUM screws from the release lever. Place in bag #3. |
 |
Turn the lever
assembly over and lift the cable holder from it's slot. (There are 2 cables on the large seat section and one cable on the small seat section). |
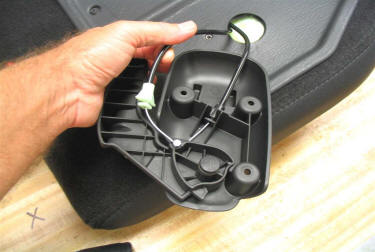 |
Rotate the
cable up and out of the lever. Repeat for the second cable. |
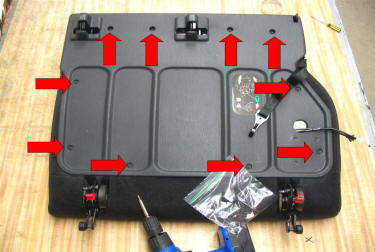 |
Remove the 10
MEDIUM screws from the plastic bottom cover. Place in bag #3. |
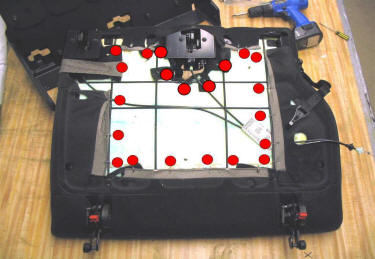 |
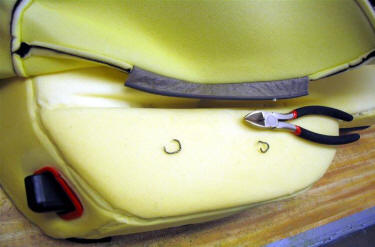
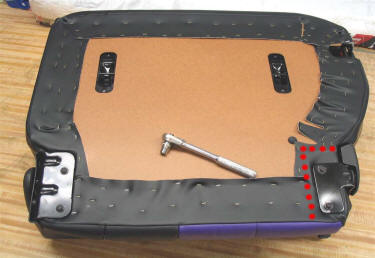
Twist and
remove the old hog-rings (shown here by Red Dots) from the old upholstery. |
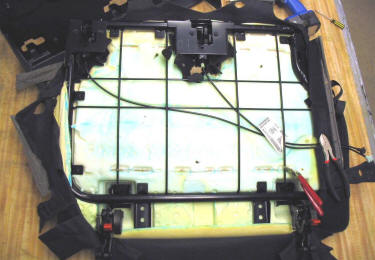 |
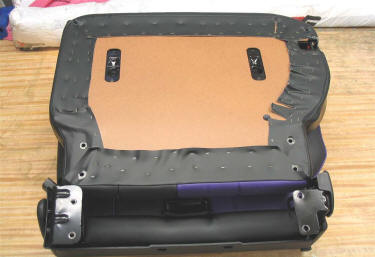
Peel the old upholstery away from the frame. |
 |
Do yourself a
favor: Hog-Ring the foam piece to the frame. This will keep the foam in place as you handle the seat section. The factory does not attach the foam to the frame. |
 |
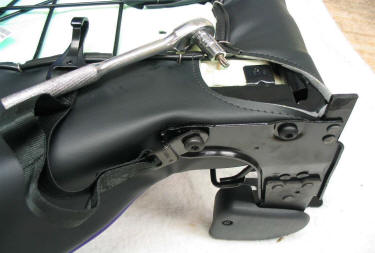
Remove the 2
bolts that hold outboard hinge. These are Torx bit bolts. The bolt that hold the strap is LONG, the other is SHORT. |
 |
Remove the
outboard hinge. Note that the long bolt that hold the strap is a 'shoulder bolt'. And that the strap is bent to clear the steel of the hinge. |
 |
Peel up the
old upholstery. Twist and remove the old hog-rings from the top of the upholstery. |
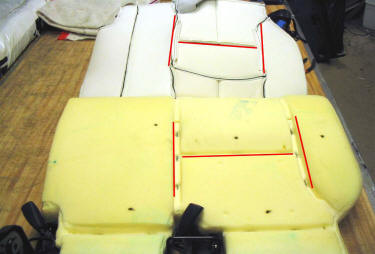 |
The Listing Strips
for the upholstery form an "H". |
 |
Install the new
upholstery. Use the provided hog rings and pliers. Install the cross bar of the
"H" first, |
 |
Once the Listing
Strips are hog-ringed roll the edges of the new upholstery over the foam. Tuck the flaps of upholstery into the seat belt opening. |
 |
Pull the
upholstery flaps under seat and hog-ring to the frame. |
 |
Tuck the last
upholstery flap under the foam to clear the child seat attachment. |
 |
Slip cables
through hole in upholstery. Pull the new upholstery tight and hog-ring in place as original. |
 |
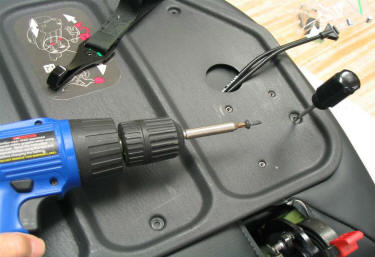
Cut holes
for the hinge bolts and re-install the outboard hinge. Remember: LONG bolt in the front holding the strap, bend in strap metal to clear hinge steel, SHORT bolt in the rear. |
 |
Re-install
the plastic bottom cover. Use the MEDIUM screws. Use the included Awl to find the screw holes. Install all 10 screws before attaching cable lever. |
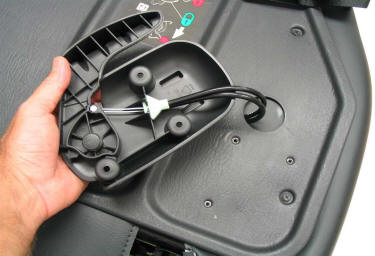 |
Attach
release cables to the lever. Attach the lever to the bottom cover with 3 MEDIUM screws. |
 |
Re-attach
the rubber bumper (apply a dab of glue first) |
 |
Re-install
the 2 MEDIUM inboard screws. Re-install the LONG and SHORT outboard screws.
Remember: |
| Next: Bolt the finished Backrest to the finished Cushion. | |
 |
Place the
backrest on the cushion. Be aware to keep the seat belt anchor off the leather to avoid scratching the new upholstery. |
 |
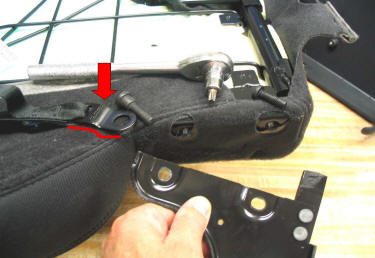
Slide the
backrest into position and re-attach using the 4 bolts. The outboard hinge will slide into place as you have cut away the corner of the original hardboard. (Shown here by the Red Dots) |
 |
Open the assembly... |
 |
and re-attach the center seat belt anchor. |
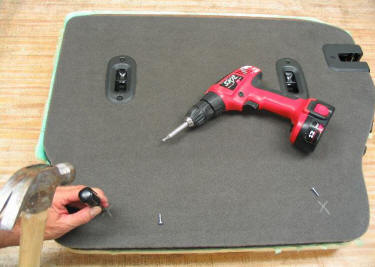 |
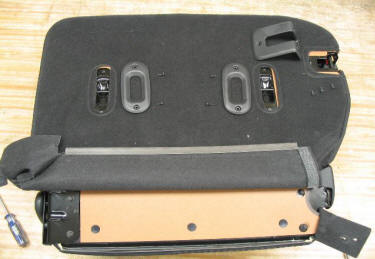
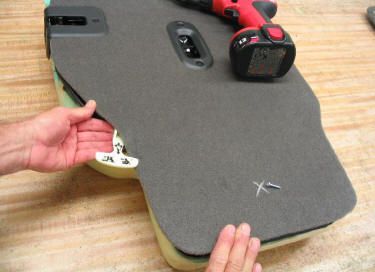
Lay the new carpet panels on the back
of the seat. Attach the original plastic trim plates. Use the included Awl tool to punch holes where the carpet is marked with a "X". Install the screw, do not use a washer. |
 |
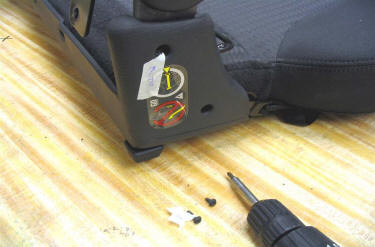
Place the
emergency release tab under the carpeted flap of the smaller rear seat section. |