 |
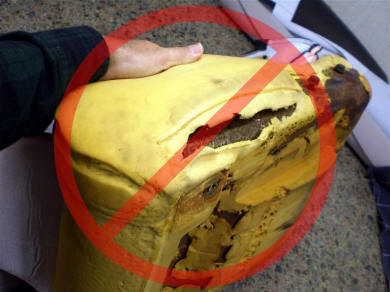
Recently a seat part was shipped back to MrMikes because something
was 'wrong'. It turns out that the owner did not 'Do-it-yourself', he took the kit to a professional. With all due respect to the professional, he did not bother with the instructions. See below for how WRONG the part was installed and the corrective measures. |
|
|
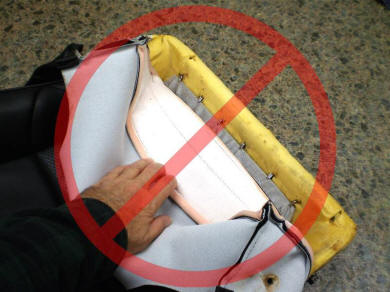 |
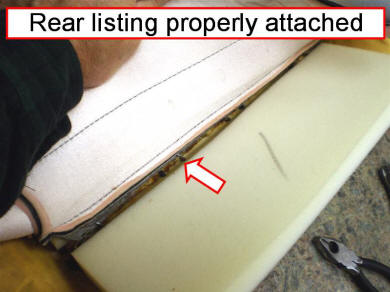
1. After removing the hog-rings from underneath, lifting the rear corners revealed: The Rear Listing was improperly
attached to |
||
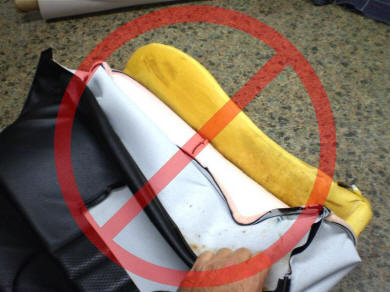 |
2. Lifting the front corners revealed: A layer of cotton padding was
NOT |
||
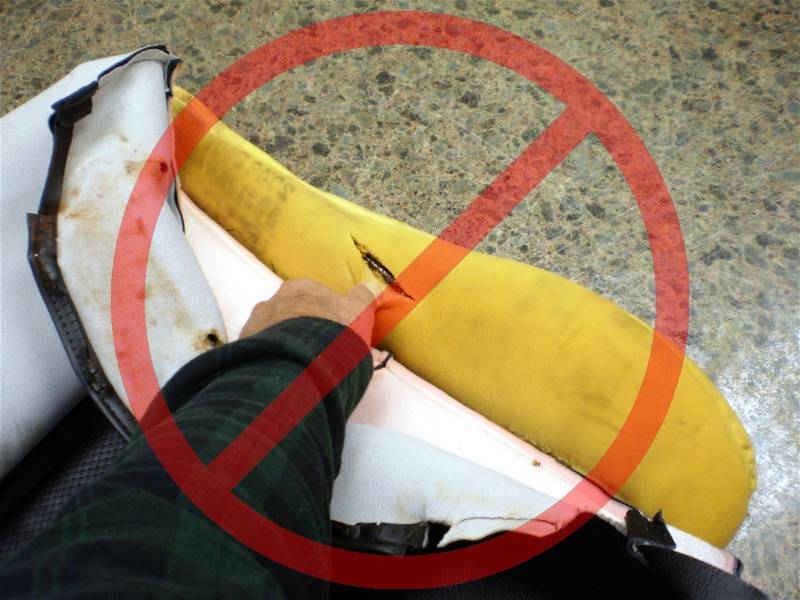 |
3. Lifting the other side revealed: ! SEAT CORE DAMAGE ! Sharp metal edges protruding through |
||
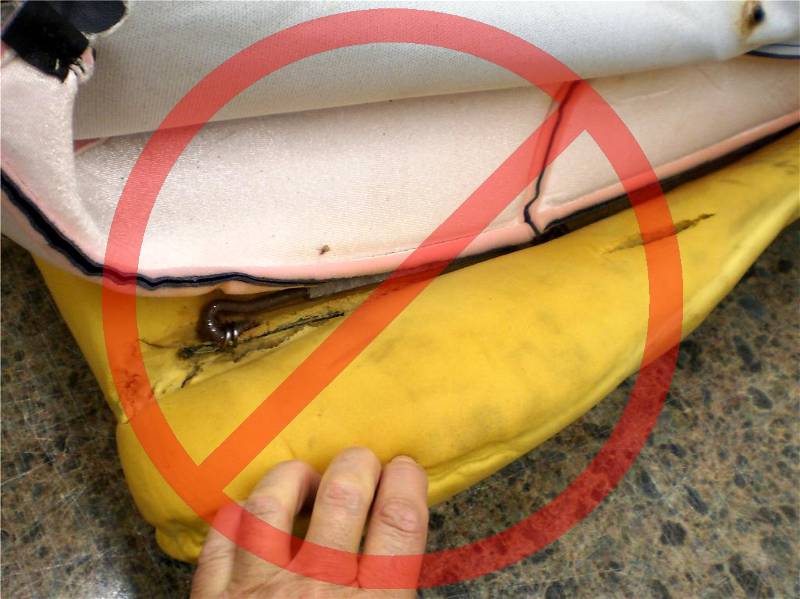 |
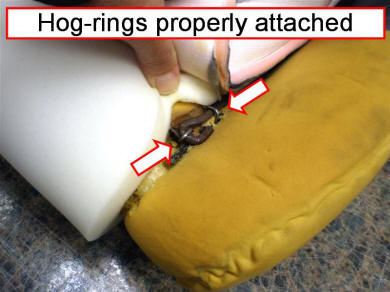
4. a) The rod mount had torn away from the foam, and b) The hog-rings are improperly installed, None of this was repaired or installed as shown in the instructions. |
||
 |
5. The leg bolster had torn loose from the frame, and was NOT repaired, as shown in the instructions. |
||
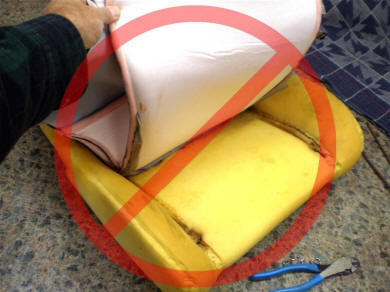 |
6. The final removal of the upholstery revealed: The complete absence of the foam pads marked 1- 2- 3 for the center of the seat, as shown in the instructions. This is a GIANT deal; |
||
 Corrective Measures and Re-assembly: Corrective Measures and Re-assembly:
|
|||
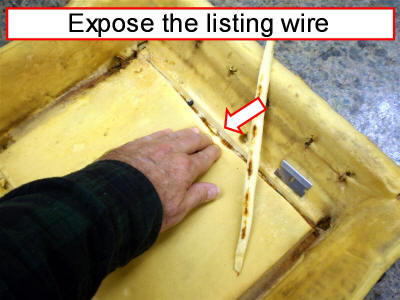 |
7. MrMike dis-assembled the seat bottom and: The center listing wires were exposed by cutting a small 'V' in the foam with the included razor blade as shown in the instructions |
||
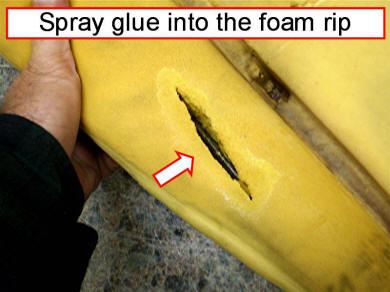 |
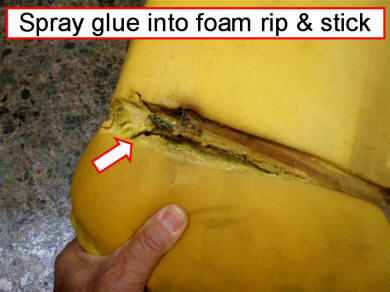
8. Spray glue (included) into any rips in the foam core. |
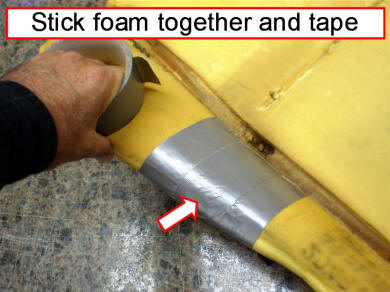 |
9. Stick the foam to close any rips, and duct tape closed for a durable repair. |
 |
10. If any of the listing wires come loose (these are buried into the foam when new) simply spray glue into the rip, wait a few minutes, push the listing wire back into the foam, and stick the foam to close. |
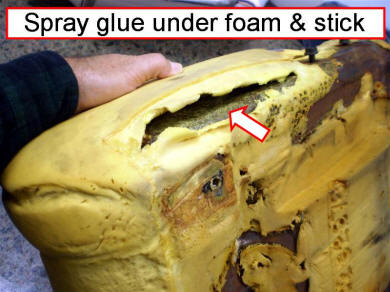 |
11. If the side leg bolsters seem to "Fall Over", check to see if the foam has come loose from the metal side of the frame. If it is loose: simply spray glue into the rip, wait a few minutes, and stick the foam back onto the frame. |
 |
12. Stick the 1-2-3 foam pads (included) to the seat with spray glue (included) as shown in the instructions |
 |
13. Hog-ring the center listing strips as shown in the instructions |
 |
14. Slip the side listing rods into the listing sleeves and attach. as shown in the instructions |
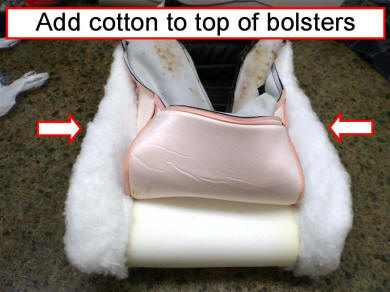 |
15. As shown on the paper update: Lay a strip of cotton padding (included) on top of the leg bolsters, this will re-new them nicely. |
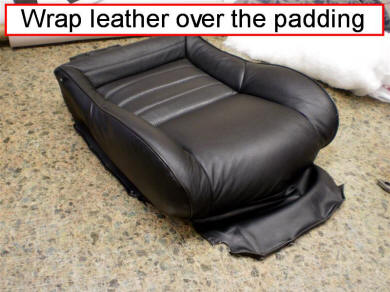 |
16. Roll the upholstery over the 4 corners,,, |
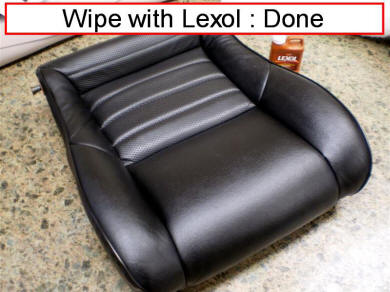 |
17. And you're done. When finished the seats will not only look new but feel new and last another couple of decades. |
Got a question?
Email MrMike
(c) mrmikes.com
jesse