Miata Seat
Dismantle

 Back

 How to Dismantle the Miata seat...
1. Remove the 4 bolts holding the tracks to the seat bottom.

  Remove the tracks.

 *Tip:
   a) Put the bolts back in:
        No
misplacing them and...
          Keeps paint off the threads (more on that later).
   b) Mark the tracks as Driver or Passenger.

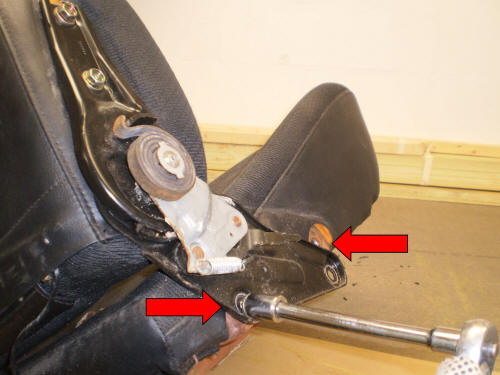
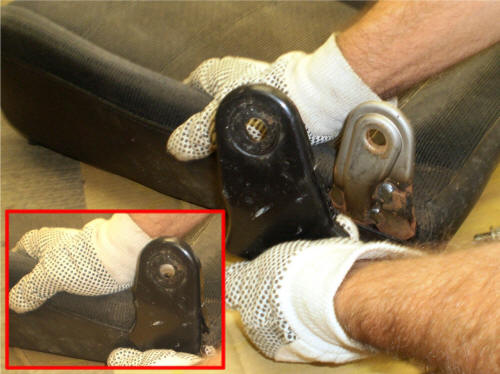
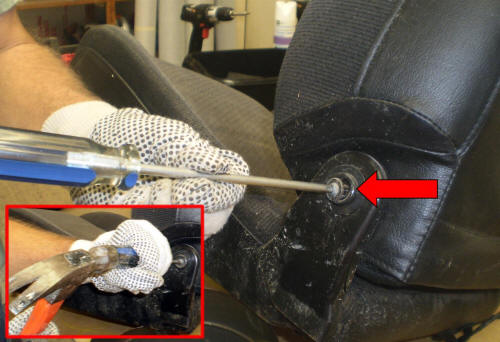
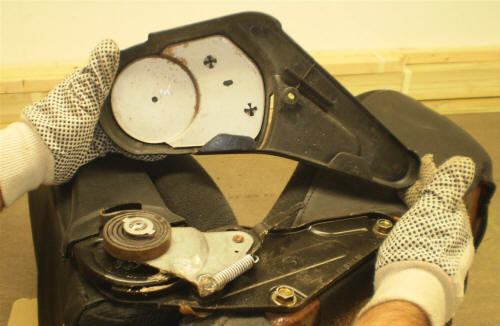
 2. Remove the Phillips Head Pivot Pin Set Screw.

   *Tip:
      TAP the Pivot Pin Set Screw with a hammer first.
       These screws are often dirty, tapping the screwdriver
        first will prevent stripping the head of the screw.
   This is a machine screw, and is difficult to remove if stripped.

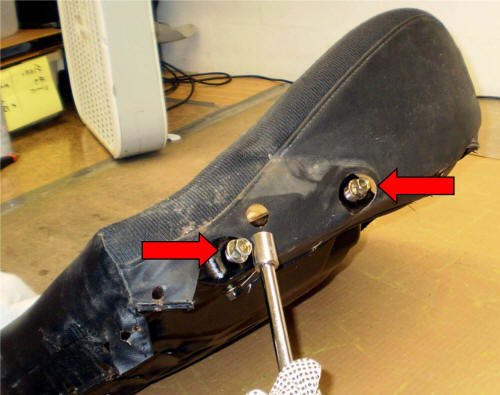
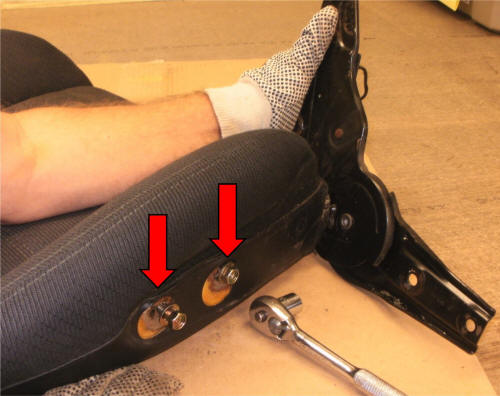
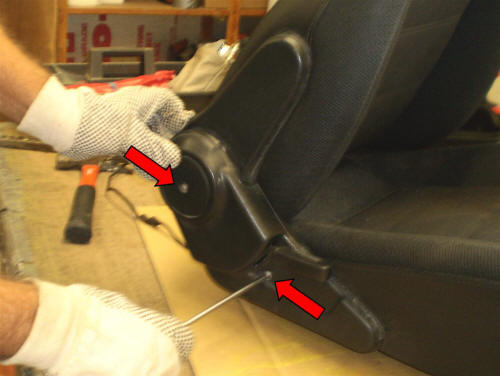
 3. Go To The Other Side:
     Remove the 2 Phillips Head Screws of the Lower Trim Cover.
     <Red Arrows>
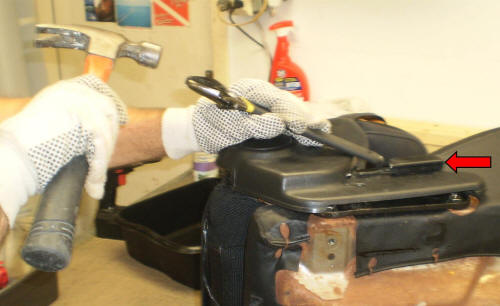
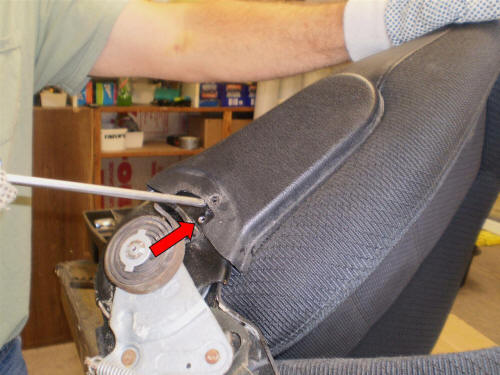
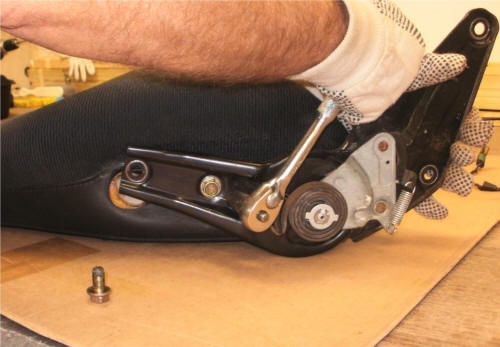
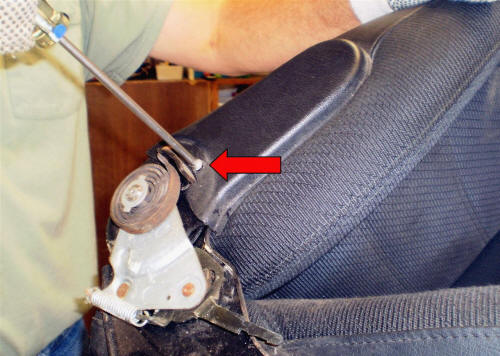
 4. TAP the Recliner Handle forward...
      using a blunt instrument, here the handle of a wrench.
     <Red Arrow>
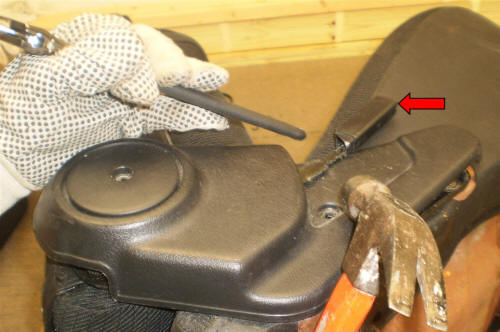
 5. Until the Recliner Handle comes off.
     <Red Arrow>
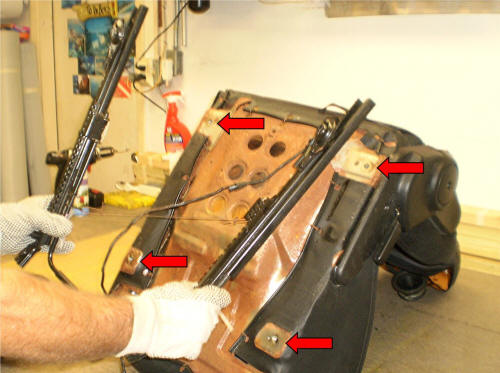
 6. Remove the Lower Trim Cover.
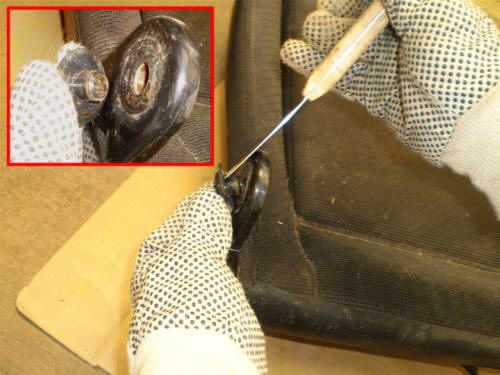
 7. Remove the Phillips Head Screw of the Upper Trim Cover...
    <Red Arrow>

 8. Pry the Upper Trim Cover up an inch...
     <Red Arrow>
 9. Lift and remove the Upper Trim Cover.

  
 10. Remove the 2 bolts holding the 'Backrest' to the 'Bottom'.
   <Red Arrows>
 11. Lift & Separate the Backrest from the Bottom.
 12. PUT THE BOLTS BACK IN.

   Tip:
    Put the bolts back in:
        No
misplacing them and,
         Makes it easy to find the holes after new upholstery is installed and,
          Keeps paint off the threads (more on that later).
 13. Use a putty knife to pry out the plastic Pivot Pin Washer.
       It is necessary to remove this in order to...

 14. Lift and remove the Pivot Pin Bracket Cover.

 15. Remove the 2 bolts holding the recliner to the Backrest.
 16. PUT THE BOLTS BACK IN.

   Tip:
     Makes it easy to find the holes after new upholstery is installed.
 The Miata seat is now dismantled and ready for the next step.
  
 Next: Paint The Seat Pans.

 Back

(c)  mrmikes.com